Category Archives: Everyday Life

The Tree Hunt

I’ve always been on the side of real Christmas trees. As a child, we’d go out to a tree farm and cut down a tree. My love for real trees isn’t entirely the tree itself, but the whole experience.

At the same time, when we adopted Reed and Lena, some lovely people decorated our house for Christmas and put up an artificial tree. Now, I get why they’re so popular, too. Easy and convenient. Plus, I’ve hated the idea of buying a tree when we have this one sitting in our basement.

Enter in the “Cedar Tree Event” where you go out an chop down an invasive red cedar for a small donation. Win/win. The fact that we found someone who could use the artificial tree sitting in our basement? That’s one more win.

If this invasive species Christmas tree thing sounds familiar, that’s because we also did it two years ago.

2014-12-13_0001

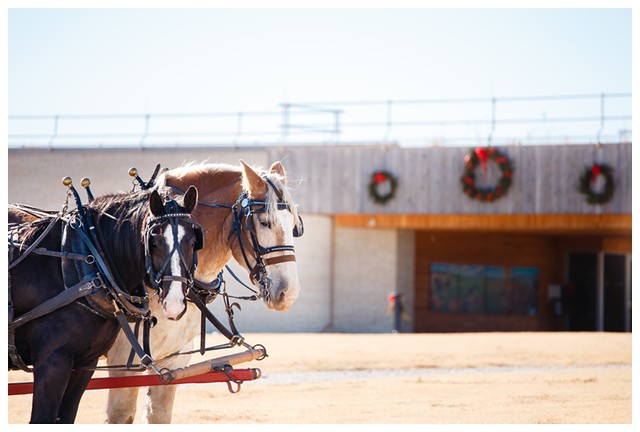
This year it was out at Mildale Farm, a property typically used for events like weddings. Totally gorgeous and I’d only seen it from the road before.

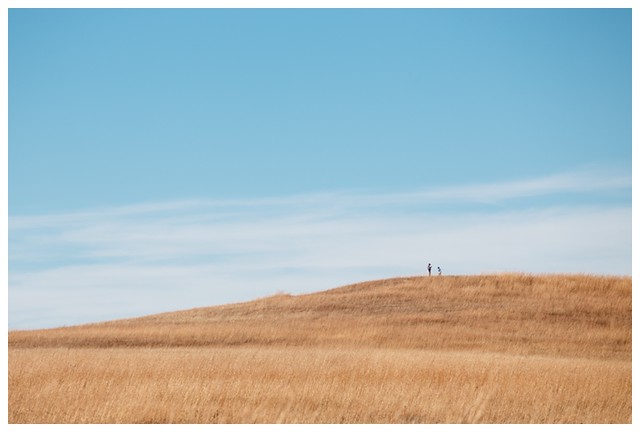
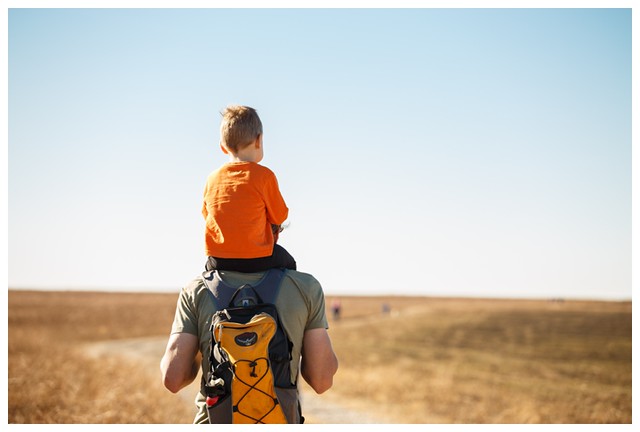
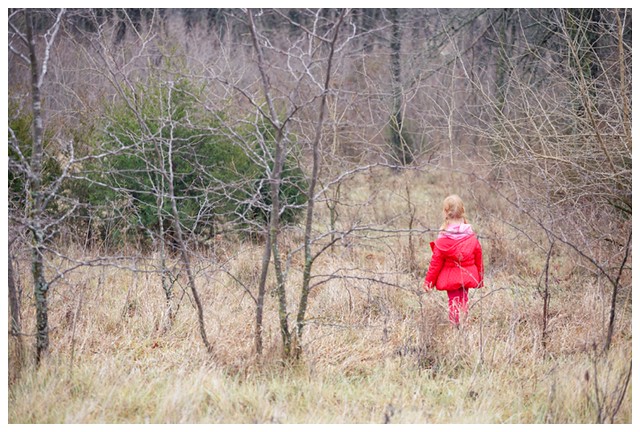
Pretty quickly, I can see the appeal of tree farms for those who like a real tree. This is not an easy task, finding a tree out here in nature.
2014-12-13_0002

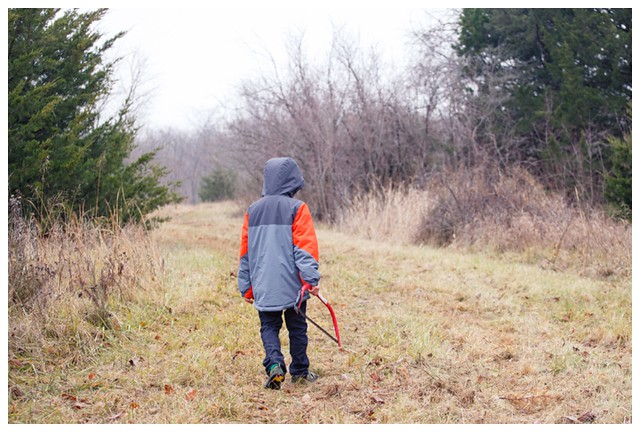
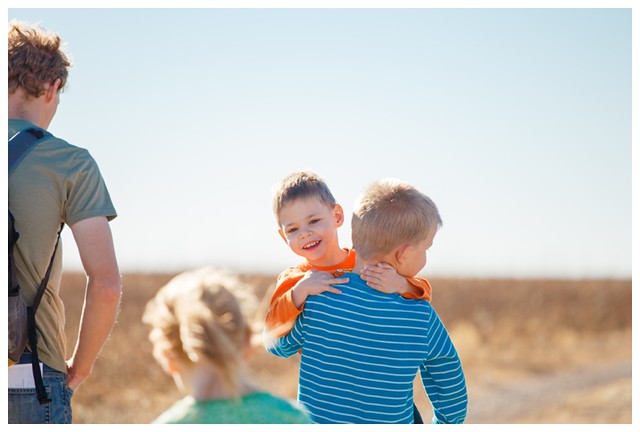
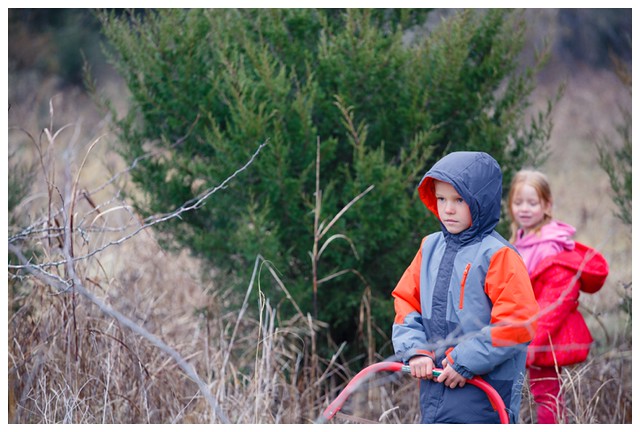
Reed and Lena kept saying “this one?” and “what about this one?”
2014-12-13_0003

2014-12-13_0004

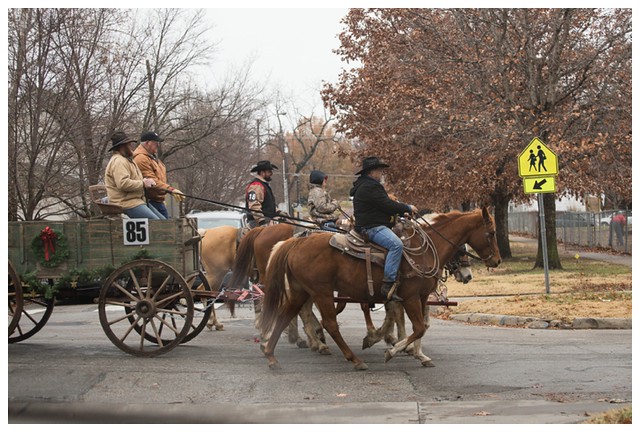
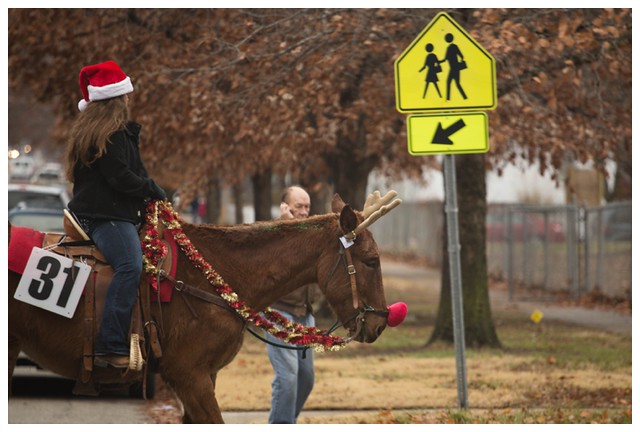
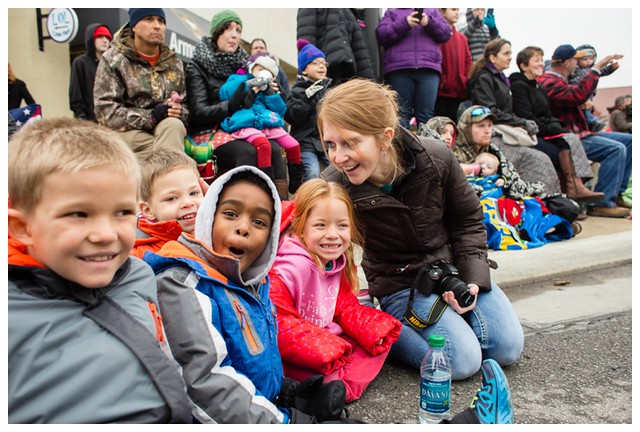
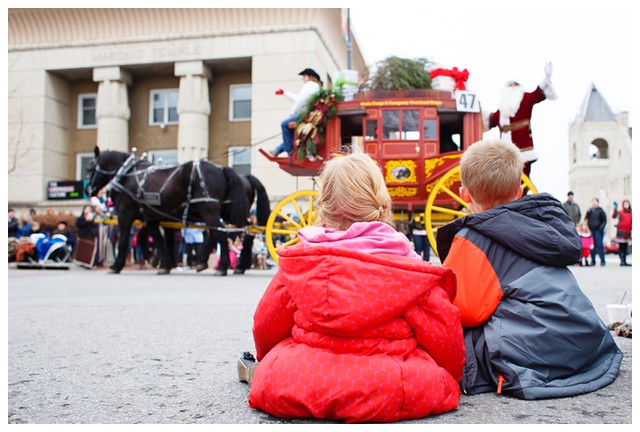
The thing is, we’d already had a busy day, with the Christmas parade and we stopped by the school Christmas shops for the kids to do their shopping before we came. So, some people (cough Gus cough) were already feeling a bit cranky.
2014-12-13_0028

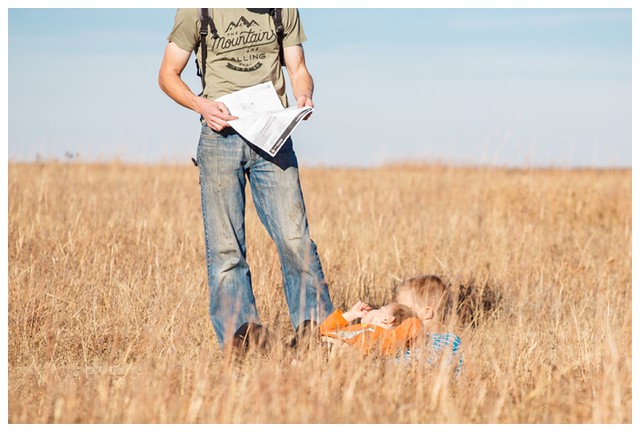
At some point, it was very clear to just pick a tree or spend out here all day.
2014-12-13_0005

We picked a tree.
2014-12-13_0006

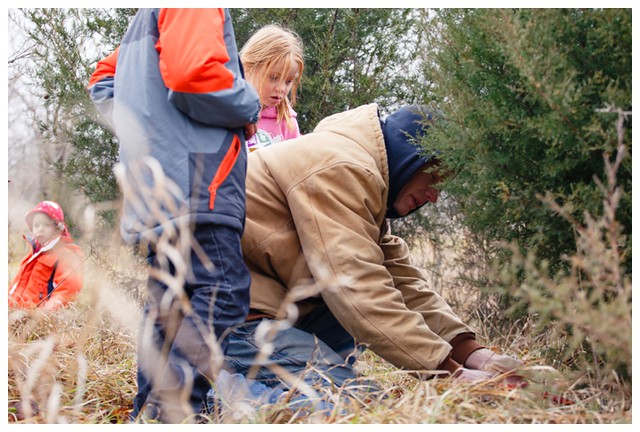
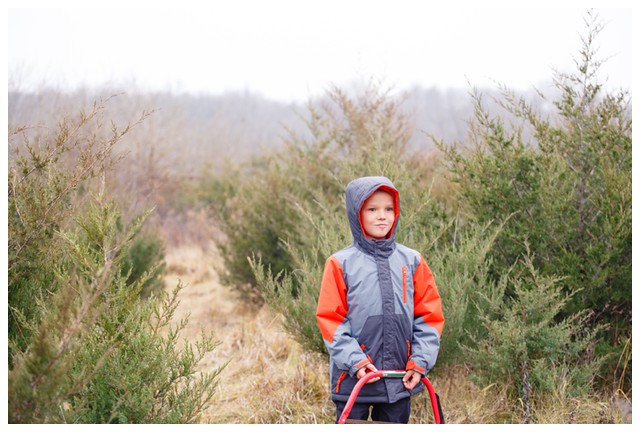
Reed actually helped with the cutting this year, too. He doesn’t quite have it figured out yet, but he’s curious.

Reed also did almost all of the dragging the tree back to the spot where they drive it to the parking lot. It hurt his hands after awhile, but he didn’t want to hand it over.
2014-12-13_0007

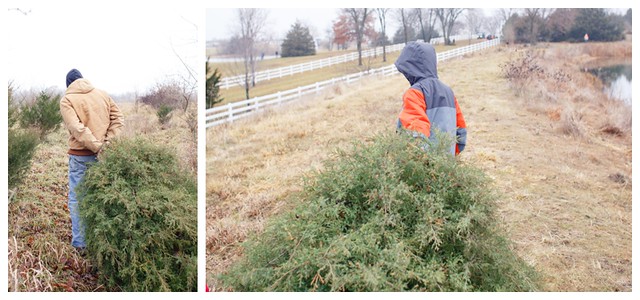
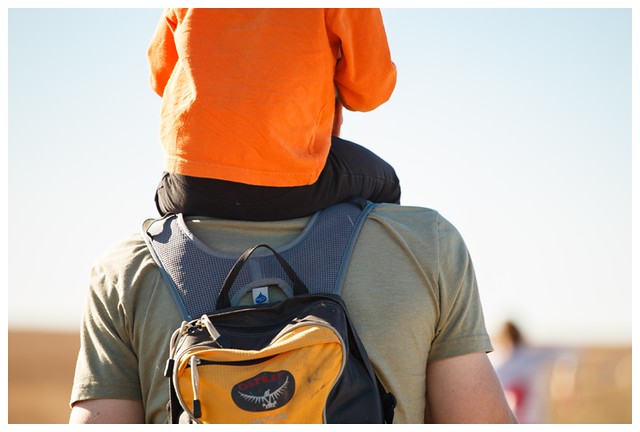
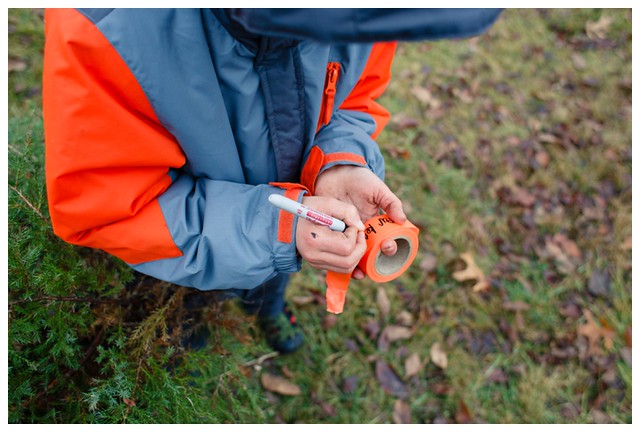
When we got back to where you tag your tree for them to drive it back, Reed did everything. It’s completely him to be able to go find a tree, chop it down and drag it back almost entirely himself by age 7, but it still surprises me to see him actually do it.
2014-12-13_0008

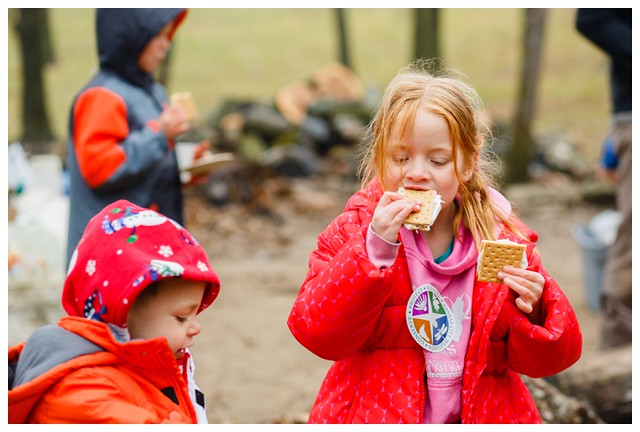
So, after we dropped off our tree, there was this on our walk back to the car. Cider, hot chocolate, cookies and a fire.
2014-12-13_0009

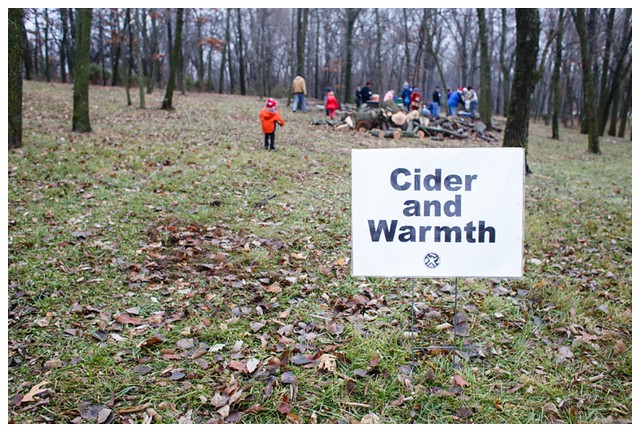
The volunteers at this event are so hospitable. The couple serving the snacks and tending to the fire was a pleasure to talk to. And, all of the volunteers we interacted with were very friendly and welcoming.
2014-12-13_0012

2014-12-13_0010

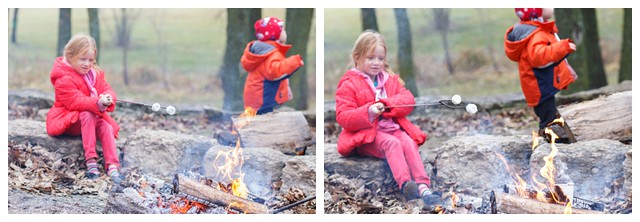
I just love this– chopping down a wild tree, then sitting by a fire.
2014-12-13_0011

2014-12-13_0014

Picking an invasive wild tree does not get you the prettiest Christmas tree by any means. However, it is quite a fun experience!

Christmas Parade

Last weekend was easily our busiest weekend of the year: Christmas parade, kids’ holiday shop, Christmas tree hunting, Aaron’s birthday and prepping for Lena’s birthday. Whew. Now that I’m mostly recovered from shoving all of that into 2 days, I have some blog posts to share! Starting with what we did last weekend…

The Christmas parade is so special. We went to it last year and it was a bucket list sort of thing then. We thought we’d be moving and I wanted to go at least once. But, we’re still here and I think we’ll keep on enjoying the parade as long as we are. It is only horses and wagons pulled by horses– no cars. When we were driving over to the parade, the traffic was stopped and we could see the horses crossing the road ahead of us. I had Aaron go down a less busy street so we could see them go by from our car.

2014-12-12_0001
I kind of love that the people walking sign is pointing to the horses. 🙂

Rudolph the Red Nosed… Horse.
2014-12-12_0002

This one looked particularly out of place to me. Sort of like it was just plopped down in 2014.
2014-12-12_0003

But, we still went to the parade, because, we were meeting friends and it was fun to see the parade a second time.
2014-12-12_0004

One of the things about hanging out with one of your closest friends is that she’s probably going to take YOUR camera and take a few pictures of you. I’m never quite so comfortable on this side of the camera, but I love these ones of me and my little man. He insisted on sitting on my lap the whole time, but he kept his mooing to a minimum. Considering he mooed at all of the horses last year, this is a big improvement.
2014-12-12_0006

2014-12-12_0005

And the parade ends with Santa.
2014-12-12_0008


Next up… Christmas tree hunting!!

Moose Gifts Christmas Shop (Bracelets, Shirts, Prints and Notecards)

I’ve had several people ask me– do you still have MudLOVE bracelets? Do you have a list of what’s available? Do you have any more shirts? So, introducing our Christmas Shop. All proceeds go directly to our hosting fees to bring Big L back, in fact, I’ll have you donate right to our Razoo account (although arrangements can be made for Paypal if needed). I have:

Here’s how this works:

  1.  Check out the list below and decide what you want to buy. If you know what you’re looking for, you can use the links above to navigate this super long post a bit easier.
  2. Shoot me an email(molly@amooseinmoscow.com) with your order or any questions that you have.
  3. I recommend that you wait for me to reply and confirm that I still have those items in stock. I will confirm that and remove them from this list.
  4. Pay for your order on via this Razoo link.
  5. I will ship your order on the next business day.

Prices for all items are noted at the top of the list. Prices include shipping with the US for First Class Mail. I am happy to ship outside the US, so please email me with your address and I will get you a quote.

Word Bracelets

($12 for 1 or $10/each for more than 1)

2014-11-18_0003

  • abide – Blue
  • abide – Pink
  • abide – Purple
  • beloved – Light Green
  • beloved – Orange
  • best friends – Blue
  • best friends – Turquoise
  • best friends – Light Green
  • best friends – Purple
  • be still – Gray
  • be still – Brown
  • be still – Light Green
  • be still – black
  • be the change – White
  • be the change – Orange
  • be the change – Pink
  • be the change – Yellow
  • be the change – Light Green
  • be the change – Black
  • beautiful – gray
  • beautiful – orange
  • beautiful – black
  • beautiful – light green
  • blessed – purple
  • blessed – light green
  • carpe diem – White
  • carpe diem – Orange
  • carpe diem – Dark Green
  • courage – yellow
  • courage – pink
  • courage – white
  • courage – light green
  • courage – burgundy
  • courage – gray
  • determined – Dark Green
  • determined – Orange
  • dream – Turquoise
  • dream – Pink
  • dream – Gray
  • dream – Light Green
  • faith – dark green
  • faith – orange
  • forever – Pink
  • forever – Turquoise
  • forgiven – Pink
  • forgiven- Brown
  • forgiven – Gray
  • grace – Orange
  • grace – Gray
  • grace – Black
  • grace – Navy Blue
  • hope – Gray
  • hope – Light Green
  • hope – Orange
  • inspire – Black
  • inspire – Green
  • joy – Black
  • joy – Brown
  • joy – Green
  • joy – Orange
  • justice – Pink
  • justice – Orange
  • justice – Gray
  • laugh – black
  • laugh – navy blue
  • laugh – gray
  • laugh – orange
  • laugh – light green
  • live- Orange
  • live – Green
  • live – Pink
  • love – Pink
  • love – Black
  • loved – Turquoise
  • loved – Brown
  • loved – Black
  • loved – Light Green
  • never give up – orange
  • overcome – light green
  • overcome – black
  • passion – black
  • passion – light green
  • passion – brown
  • Proverbs 31 – yellow
  • Proverbs 31 – turquoise
  • Proverbs 31 – light green
  • Proverbs 31 – pink
  • run – white
  • run – orange
  • run – light green
  • run – dark green
  • run – black
  • set free – gray
  • set free – light green
  • set free – pink
  • sing – pink
  • sing – orange
  • sisters – light green
  • sisters – yellow
  • sisters – pink
  • sisters – black
  • smile:) – gray
  • smile:) – dark green
  • smile:) – orange
  • smile:) –  navy blue
  • strength – blue
  • strength – purple
  • trust – burgundy
  • trust – light green x 2
  • trust – pink
  • trust – brown
  • worship – pink
  • worship – turquoise
  • WWJD – light green
  • WWJD – yellow
  • Yahweh – yellow
  • Yahweh – blue
  • Yahweh – pink
  • Yahweh – brown

Animal Bracelets

($14 for 1 or $12/each for more than 1)

2014-11-18_0004

  • chimpanzee – dark green
  • chimpanzee – pink
  • chimpanzee – gray
  • chimpanzee – navy blue
  • frog – gray
  • frog – pink
  • frog – orange
  • giraffe – pink
  • giraffe – orange
  • giraffe – red
  • giraffe – light green
  • giraffe – black
  • horse – navy blue
  • horse – turquoise
  • horse – yellow
  • horse – light green
  • horse – orange
  • horse – gray
  • horse – black
  • lion – pink
  • lion – orange
  • lion – black
  • lion – dark green
  • owl – yellow
  • owl – dark green
  • owl – gray
  • owl – light green
  • owl – orange
  • owl – black
  • owl – white
  • owl – pink
  • owl – navy blue
  • stegosaurus – black
  • stegosaurus – pink
  • turtle – pink
  • turtle – turquoise
  • turtle – brown
  • turtle – red
  • zebra – pink
  • zebra – yellow
  • zebra – turquoise

Shirts

(crewneck = $20 shipped, vneck = $22 shipped)

Molly Parker Shirt2 (3) Tips about sizing: These are unisex sizes. The crewneck (not the vneck) are a little less “generous” than regular shirts, so you may want to size up if you are between sizes.

  • medium – crewneck
  • extra large – crewneck x 3
  • medium – vneck x 2
  • large – vneck

Prints

I have just a few prints left in stock from our spring sale. Blossom – 8×10, $12 shipped 1932701_1475184199378176_7715344553547775776_o Morning Light 5×7, $8 shipped (3 available) 8×10, $12 shipped (2 available) 10250055_1475181526045110_1365307562262164955_n Blood Moon – 8×12, $15 shipped (2 available) 10178055_1475179192712010_8665253073469182955_n

Notecards

($12 per set of 5)

These notecards are blank inside. They’re perfect for nearly any kind of note that you need to send– thank you notes, thinking of you, etc. Most of these are sets of 5 different cards and the collage shows the 5 images included in the set. Colorful Set (2 available) 10372596_1491000731129856_11372613881034127_n April Set (5 available) 10313572_1491000737796522_6704526852577305620_n Floral Set (4 available) 10366037_1491000764463186_770919198108604714_n Miscellaneous Set (4 available) 10390031_1491000767796519_257010726873824626_n All Seasons Set (4 available) 10402690_1491000771129852_4550596801458995871_n-1 Pink and Purple Set (2 available) 10313999_1491000794463183_3766218419709280831_n Morning Light – all 5 the same (2 available) 10365788_1491027574460505_7891645515760061236_n April Showers – all 5 the same (2 available) 10292483_1491029247793671_33850438470784251_n Best Buds – all 5 the same (1 available) 10361456_1491027641127165_2834793621074247242_n Thanks for looking. 🙂

My (Almost Free) Faux Fireplace

2014-12-05_0005
The day after Thanksgiving, I got the urge to do a Christmas craft. I had the day off, just chilling at home and I wanted to make something. Almost everything I create is digital and I knew I wanted to make some physical for a change.

I had two criteria: 1. I didn’t want to leave my house for the materials. 2. I didn’t want to spend money on the materials. I guess those two kind of go together.

Anyways, I had seen a cardboard fireplace made from boxes, and I decided to make one! There are lots of other tutorials out there on cardboard fireplaces, but since it had to meet my criteria of being from materials I already had and basically free, I just used them for inspiration and then made it up my own as I went. I call it almost free, because I did end up needing to buy a bit more Modge Podge. Considering most of the materials were headed for our recycling bin, I think it’s still a win.

I shared a photo on Facebook and Instagram yesterday and a few people asked me how I went about it. This is my mediocre tutorial– I’m not used to writing tutorials for crafty stuff!! On top of that, I did just sort of “wing it”.  But, perhaps if someone else decides to tackle this project, it will be helpful.

Supplies:

  • Several boxes. One thin, rectangular one for the actual fireplace(33x26x8). 3 exact same size ones for the mantle(13x11x6) and a couple of long skinny ones for the chimney(approx. 18x12x5). If you cannot find a perfectly large box, see my notes in step one for another idea.
  • White scrap paper
  • Brown packing paper
  • Boxcutter
  • Scissors
  • Glue
  • Modpodge
  • Duct Tape– ideally black
  • Packing tape or scotch tape
  • 3 different colors of red and orange cardstock
  • paper towel and toilet paper tubes
  • brown and orange paint
  • paint brush(es)
  • black permanent marker
  • one string of Christmas lights

Whew, that seems like a lot of stuff! But, it’s really not that bad– I just grabbed random supplies as I went. I have a few thoughts on how you could substitute different items, especially if you want to make it easier or you need to buy supplies anyways.

Here are the steps:

  1. Choose your big box. I originally either got it from a napkin shipment or from a canvas shipment– not sure anymore. It is about 33″x26″x8″.  Note: if you can’t find a big box like this, you could make a frame from several smaller boxes(like this). I think it would be harder to get a nice arch for the opening, although perhaps you could cut the front out of another piece of cardboard and tape that to the front.
  2. If you are using one big box, mark off your arch. This is hard to explain without lots of numbers. Basically, measure in from the sides and down from the top to figure out the sides– mine was in about 6″ on each side and down about 12″. On the arch part, mark off the center, but don’t measure down as far as you did on the sides, mine was about 8″ down in the center. Then, I used a crockpot to get the oval shape, tracing it from my center mark to the sides that I had marked off.
  3. Cut out the fireplace hole with your box cutter.
  4. This would be a good time to make sure that your box is still sturdy. If not, reinforce with duct tape where you can. Don’t worry about how the box actually looks right now, it’s just the skeleton and none of this will show.
  5. Now, to cover the box, I tore up bits of white scrap paper and glued them to my box with Modge Podge. I wanted the “mortar” type of look, with a rough texture. Plus, I did not want the seams of using several pieces of smaller paper. If I were to do this again and be willing to spend money on this project, I think I would have instead wrapped my box in white wrapping paper or craft paper and saved a whole lot of time!2014-12-05_0002
  6. For the chimney, take two oblong boxes and tape them together. I left the top end of mine open, so i can stick a little Santa hat poking out. I used some cardboard scraps and some duct tape to make it sort of curved where the boxes met.
  7. Repeat step #5 with the chimney.
  8. Now, cut out your bricks. I have a paper cutter, which did save me a lot of time here. I used regular 8.5×11″ cardstock. First, cut your paper in half length wise (so you have two long strips). Then, cut each of those strips into 4 pieces. Each piece would be 4.25″ x 2.75″.
  9. Start gluing the “bricks” onto your fireplace with Modge Podge. Start with the sides and cut some of your bricks into smaller pieces, so that they aren’t all lined up evenly with the side of your fireplace. When you get to the arch, cut a few bricks in half and use them at the top of the arch. Use your scissors to cut bricks to fit around them.2014-12-05_0001
  10. Cover the entire fireplace with bricks, then repeat on the chimney.
  11. Once you’ve covered the fireplace in bricks, it’s time to build the mantle. For the mantle, I used 13x11x6″ boxes and taped them together lengthwise, so it was like one big giant box which was 39″x11″x6″.
  12. Then, I took some shipping paper, the kind that some companies put into boxes for packing, and taped that onto my box. My paper wasn’t quite bit enough to fully wrap the box, so I taped it on the bottom and then glued down the ends.
  13. Because I had tape on the ends of my box as well, I needed to cover them as well. I took an old paper grocery bag and cut that to cover the ends and glued that on.
  14. Then, I pulled out some paint. I used brown, orange and yellow. Tip: If you don’t have brown paint, you can mix other paint colors to get it. Mix all of your primary colors or mix complimentary colors (blue and orange, purple and yellow or red and green) to make brown.
  15. I just sort of painted length wise on my mantle to create a little fake wood look, varying the width of my strokes, or making some with slight turns.
  16. On the ends, I did a half circle design, mimicking tree rings.2014-12-05_0006
  17. Just the plain lines painted on there looked a bit to dramatic for me, so I decided to go over my “wood” with a little wash. I mixed some paint– brown and red, with some water to thin it out. I gently applied this across my paper, careful not to get any one spot too wet and warp the paper.
  18. Let your mantle dry.
  19. While your mantle is drying, mix up another “wash”, this time using gray or black. You want it to be about half water and half paint.
  20. Carefully, paint the inside of your fireplace and chimney with this. It does not need to be evenly distributed. The look you are going for here is soot.2014-12-05_0004
  21. Once all of the pieces are dry, use duct tape to secure them together. You could use glue, but I wanted to be able to carefully take mine apart later if needed.2014-12-05_0007
  22. Almost done! Now, cut a small hole in the bottom back corner of your fireplace, on the side of your closest outlet. feed the plug of your Christmas lights through this hole.
  23. The last part is making some logs. This would be a great step to involve your kids with. Grab some toilet paper or paper towel rolls. Taking a black marker, draw lines on the logs to give it a fake wood look. You can also tape off the ends, using masking tape, and draw tree rings on these, too.
  24. Toss the logs into your fireplace, plug it in and you’re set!

Some other thoughts and ideas

  • The bricks: Some party supply stores actually sell wall coverings which look like bricks (like this). You could just use this to wrap the fireplace entirely and save yourself a lot of work!
  • The mantle: I think it would look really nice with white paper nicely wrapped around in, instead of the wood look. Think: white painted mantle.
  • Also the mantle: Foam would also work really well for the mantle if you could not find good boxes for that.
  • Logs and fire: LED candles would also work nicely in the fireplace. I love the look of candles in wood logs (like this), too.

2014-12-05_0003


The end result: I love it. It adds just a bit of silly homeyness to our living room. It’s not a real fireplace, but the glow of the Christmas lights is surprisingly charming.

And, the kids are super excited. Reed said “Thank you for making it! Now I have some place to hang my stocking!” 🙂

Country Christmas

Confession: I don’t totally love life on the Great Plains. This probably doesn’t come as a shock for those of you who know we’ve spent about a quarter of our time here trying to move.
2014-11-29_0005

But, the plains have a beauty that isn’t so obvious. One that I often forget about. The people are top-notch, kind and generous, just as one man wrote about at the end of this baseball season. The open spaces can be serene, especially when you’re just itching for some quiet time. And, sometimes we find a gem of a location or activity, something we just wouldn’t find elsewhere.
2014-11-29_0019

Anyways, that was a long intro to tell you about our day. Yesterday, Aaron asked me if I’d like to go to Tallgrass National Preserve again, perhaps to see the buffalo. Of course, I brought up the failed llama adventures of last weekend and suggested that he was trying to lure me into more hiking with the promise of furry animals.

(In case you’re wondering about when you’ve heard about Tallgrass National Preserve before, that would be our failed trip here and our trip with my mom here.)

Anyways, I hesitantly agreed and hesitantly dragged myself out of bed this morning.

When we pulled up THIS was the first thing I saw.
2014-11-29_0008

Lest you think my husband is great at surprises, he was surprised, too. And when we went into the visitor’s center and the same friendly park ranger we met in March told us that it was “free” and “happening all afternoon”, I was pretty excited. Free wagon rides on the prairie.
2014-11-29_0013

The visitor’s center was also totally redone and is very kid-friendly. I think if we hadn’t been so excited about what was happening outside, we could have enjoyed more exploration in here, too.
2014-11-30_0001

So, back outside.

2014-11-29_0007

“Chase County Country Christmas”… isn’t that a mouthful?
2014-11-29_0012

The wagon ride was just a short trip to the barn, where there were MORE surprises. First, we were directed outside by two “cowboys” who bantered on about whether they had seen a bear up on the hill or if it was Santa.
2014-11-30_0003

Then they took us inside and read “The Night Before Christmas”, also complete with cowboy bantering.
2014-11-30_0002

There were two musicians playing live Christmas music. And, a woman spinning yarn on her loom.
2014-11-29_0011

It was a lot of fun and we talked with the kids about pioneer life and home on the prairie before modern conveniences.

Then, we went for our hike.
2014-11-29_0015

We had some people stop and tell us, “there are buffalo about a mile ahead.” After we passed them, I told Aaron, “this better not be another moose situation”. Referring to the times we’ve been told that there were moose ahead and there were none.

Gus was tired, so Aaron and Reed took turns carrying him. Well, Reed tried.
2014-11-29_0009

And tried.
2014-11-29_0018

Aaron carried Gus most of the way, which does make for some fun photos.
2014-11-29_0020

And, eventually, we saw them. Far off in the distance, with a warning not to get too close, there were the bison.
2014-11-29_0016

The kids sat on the ground, or laid on each other while I took a bunch of bison photos, almost all of which look like the one above.
2014-11-29_0017

I might have been a bit bolder under normal circumstances, but considering I’ve read a lot about the dangers of bear selfies recently, I thought perhaps the warning to stay away from the bison might be legitimate, too.

And then, back to the car. Gus was ready to crash. And, I think we were all a bit tired of hearing about how hard riding on Aaron’s shoulders was. 🙂
2014-11-29_0010

That was our day. A gorgeous day for hiking and a little bit of Christmas magic to start off the season.