The day after Thanksgiving, I got the urge to do a Christmas craft. I had the day off, just chilling at home and I wanted to make something. Almost everything I create is digital and I knew I wanted to make some physical for a change.
I had two criteria: 1. I didn’t want to leave my house for the materials. 2. I didn’t want to spend money on the materials. I guess those two kind of go together.
Anyways, I had seen a cardboard fireplace made from boxes, and I decided to make one! There are lots of other tutorials out there on cardboard fireplaces, but since it had to meet my criteria of being from materials I already had and basically free, I just used them for inspiration and then made it up my own as I went. I call it almost free, because I did end up needing to buy a bit more Modge Podge. Considering most of the materials were headed for our recycling bin, I think it’s still a win.
I shared a photo on Facebook and Instagram yesterday and a few people asked me how I went about it. This is my mediocre tutorial– I’m not used to writing tutorials for crafty stuff!! On top of that, I did just sort of “wing it”. But, perhaps if someone else decides to tackle this project, it will be helpful.
Supplies:
- Several boxes. One thin, rectangular one for the actual fireplace(33x26x8). 3 exact same size ones for the mantle(13x11x6) and a couple of long skinny ones for the chimney(approx. 18x12x5). If you cannot find a perfectly large box, see my notes in step one for another idea.
- White scrap paper
- Brown packing paper
- Boxcutter
- Scissors
- Glue
- Modpodge
- Duct Tape– ideally black
- Packing tape or scotch tape
- 3 different colors of red and orange cardstock
- paper towel and toilet paper tubes
- brown and orange paint
- paint brush(es)
- black permanent marker
- one string of Christmas lights
Whew, that seems like a lot of stuff! But, it’s really not that bad– I just grabbed random supplies as I went. I have a few thoughts on how you could substitute different items, especially if you want to make it easier or you need to buy supplies anyways.
Here are the steps:
- Choose your big box. I originally either got it from a napkin shipment or from a canvas shipment– not sure anymore. It is about 33″x26″x8″. Note: if you can’t find a big box like this, you could make a frame from several smaller boxes(like this). I think it would be harder to get a nice arch for the opening, although perhaps you could cut the front out of another piece of cardboard and tape that to the front.
- If you are using one big box, mark off your arch. This is hard to explain without lots of numbers. Basically, measure in from the sides and down from the top to figure out the sides– mine was in about 6″ on each side and down about 12″. On the arch part, mark off the center, but don’t measure down as far as you did on the sides, mine was about 8″ down in the center. Then, I used a crockpot to get the oval shape, tracing it from my center mark to the sides that I had marked off.
- Cut out the fireplace hole with your box cutter.
- This would be a good time to make sure that your box is still sturdy. If not, reinforce with duct tape where you can. Don’t worry about how the box actually looks right now, it’s just the skeleton and none of this will show.
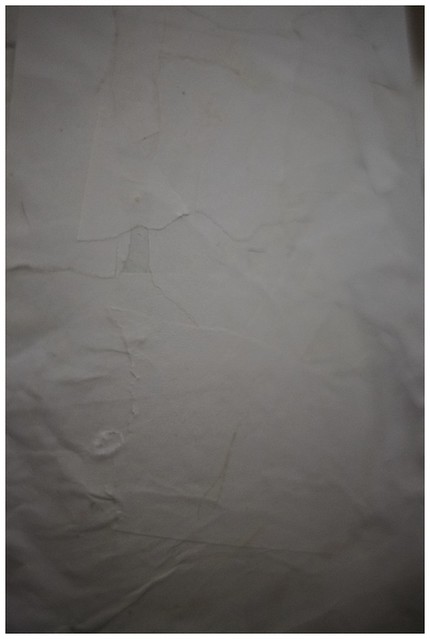
- Now, to cover the box, I tore up bits of white scrap paper and glued them to my box with Modge Podge. I wanted the “mortar” type of look, with a rough texture. Plus, I did not want the seams of using several pieces of smaller paper. If I were to do this again and be willing to spend money on this project, I think I would have instead wrapped my box in white wrapping paper or craft paper and saved a whole lot of time!
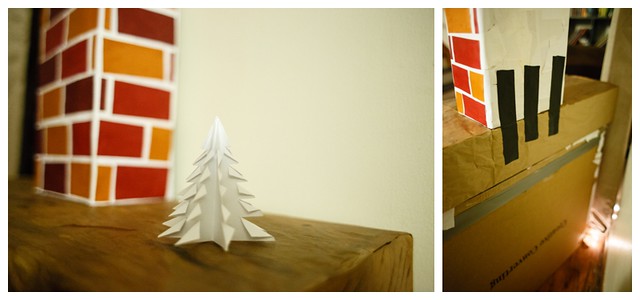
- For the chimney, take two oblong boxes and tape them together. I left the top end of mine open, so i can stick a little Santa hat poking out. I used some cardboard scraps and some duct tape to make it sort of curved where the boxes met.
- Repeat step #5 with the chimney.
- Now, cut out your bricks. I have a paper cutter, which did save me a lot of time here. I used regular 8.5×11″ cardstock. First, cut your paper in half length wise (so you have two long strips). Then, cut each of those strips into 4 pieces. Each piece would be 4.25″ x 2.75″.
- Start gluing the “bricks” onto your fireplace with Modge Podge. Start with the sides and cut some of your bricks into smaller pieces, so that they aren’t all lined up evenly with the side of your fireplace. When you get to the arch, cut a few bricks in half and use them at the top of the arch. Use your scissors to cut bricks to fit around them.
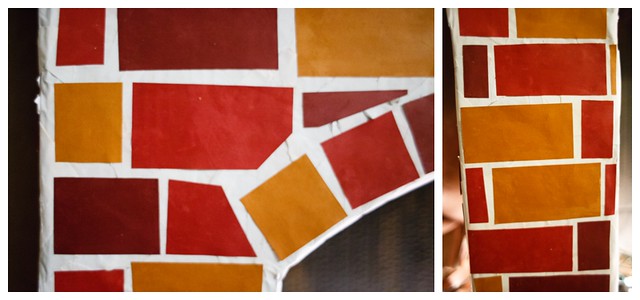
- Cover the entire fireplace with bricks, then repeat on the chimney.
- Once you’ve covered the fireplace in bricks, it’s time to build the mantle. For the mantle, I used 13x11x6″ boxes and taped them together lengthwise, so it was like one big giant box which was 39″x11″x6″.
- Then, I took some shipping paper, the kind that some companies put into boxes for packing, and taped that onto my box. My paper wasn’t quite bit enough to fully wrap the box, so I taped it on the bottom and then glued down the ends.
- Because I had tape on the ends of my box as well, I needed to cover them as well. I took an old paper grocery bag and cut that to cover the ends and glued that on.
- Then, I pulled out some paint. I used brown, orange and yellow. Tip: If you don’t have brown paint, you can mix other paint colors to get it. Mix all of your primary colors or mix complimentary colors (blue and orange, purple and yellow or red and green) to make brown.
- I just sort of painted length wise on my mantle to create a little fake wood look, varying the width of my strokes, or making some with slight turns.
- On the ends, I did a half circle design, mimicking tree rings.

- Just the plain lines painted on there looked a bit to dramatic for me, so I decided to go over my “wood” with a little wash. I mixed some paint– brown and red, with some water to thin it out. I gently applied this across my paper, careful not to get any one spot too wet and warp the paper.
- Let your mantle dry.
- While your mantle is drying, mix up another “wash”, this time using gray or black. You want it to be about half water and half paint.
- Carefully, paint the inside of your fireplace and chimney with this. It does not need to be evenly distributed. The look you are going for here is soot.

- Once all of the pieces are dry, use duct tape to secure them together. You could use glue, but I wanted to be able to carefully take mine apart later if needed.
- Almost done! Now, cut a small hole in the bottom back corner of your fireplace, on the side of your closest outlet. feed the plug of your Christmas lights through this hole.
- The last part is making some logs. This would be a great step to involve your kids with. Grab some toilet paper or paper towel rolls. Taking a black marker, draw lines on the logs to give it a fake wood look. You can also tape off the ends, using masking tape, and draw tree rings on these, too.
- Toss the logs into your fireplace, plug it in and you’re set!
Some other thoughts and ideas
- The bricks: Some party supply stores actually sell wall coverings which look like bricks (like this). You could just use this to wrap the fireplace entirely and save yourself a lot of work!
- The mantle: I think it would look really nice with white paper nicely wrapped around in, instead of the wood look. Think: white painted mantle.
- Also the mantle: Foam would also work really well for the mantle if you could not find good boxes for that.
- Logs and fire: LED candles would also work nicely in the fireplace. I love the look of candles in wood logs (like this), too.
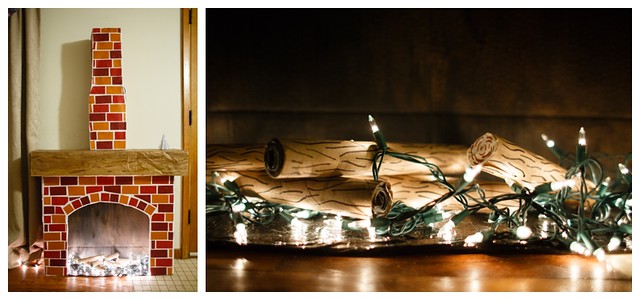
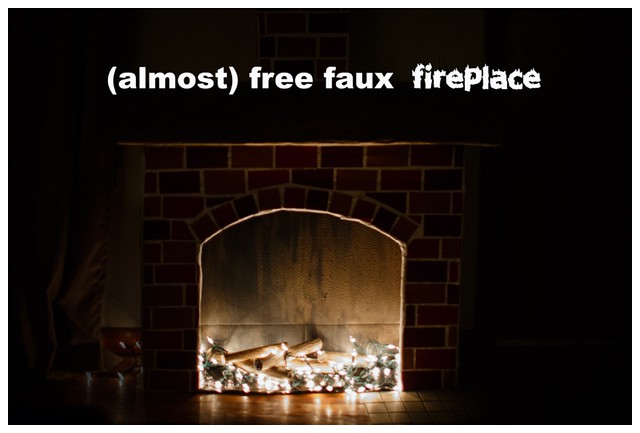
The end result: I love it. It adds just a bit of silly homeyness to our living room. It’s not a real fireplace, but the glow of the Christmas lights is surprisingly charming.
And, the kids are super excited. Reed said “Thank you for making it! Now I have some place to hang my stocking!” 🙂

I’m super impressed! That is so cute!